If you're new to creating web (HTML) documents, you may want to use these short tutorials.
The tutorials cover the following topics:
The tutorials don't cover each topic exhaustively, but give enough information for you to master a topic with additional details from the next chapter, HTML Quick Reference.
The first tutorial may be used as a `quick start' that shows you how to create a file with HoTMetaL. When you've finished that section, you can continue with the other sections or, if you feel comfortable using or experimenting with HTML, you can skip over the rest of the tutorials and refer to the HTML Quick Reference when you need to find out something about HTML.
Three toolbars should be visible. If they aren't:
Now:
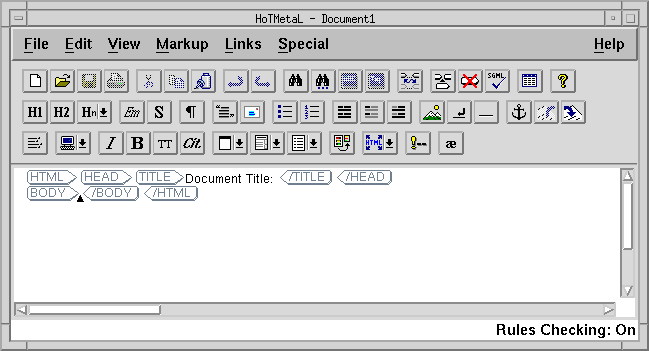
HoTMetaL opens this template, which you can now edit. Notice that the file name in the document window is Document1: when you open a template, HoTMetaL changes the name so that when you save the document, the original template doesn't get overwritten.
This template contains all the required parts for a valid HTML document (head, title, body) but it doesn't have any content yet.
The label inside TITLE is not part of the content of the element: it's a prefix that prompts you to enter some text.
When you display this document in a browser, the contents of this element will be displayed in the title bar.
The main part of your document is the body, contained in the BODY element.
You have many choices of elements to insert. However, it's normal to start your document with a heading. Web documents have six levels of headings, represented by the elements H1 through H6.
An H1 heading should be used for major divisions in your document.
 toolbar button.
George Orwell
Now you're ready to insert some text.
 (paragraph) toolbar
button.
(paragraph) toolbar
button.
You can begin smaller subdivisions of the document with lower-level ( H2 through H6) headings. You can skip levels if you want, but your documents will usually look better if you don't.
 toolbar button.
 Early life and education
toolbar button. 
The document should now look something like this: 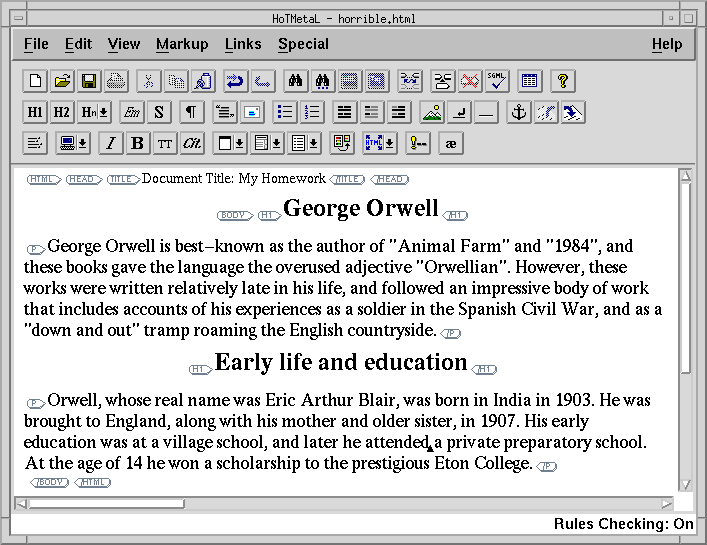
Now perhaps you'd like to see what this document will look like when it's published on the Web. But first, save the file:
 toolbar button, choose
Save from the File menu,
or type
Ctrl+S
at the keyboard and save the file using the file chooser dialog box that appears.
toolbar button, choose
Save from the File menu,
or type
Ctrl+S
at the keyboard and save the file using the file chooser dialog box that appears.If you have never chosen a browser (such as Mosaic or Netscape) for previewing, you'll get a file chooser dialog box that lets you locate and choose one. Once a browser has been chosen you'll get a dialog box displaying a list of all the browsers you've chosen.
The browser is launched, displaying your document.
Note: If you choose the Preview... command again, the browser will be launched a second time. To avoid using up memory by running multiple copies of the browser, you should either dismiss the browser after viewing the file, or, instead of using Preview..., save the file in HoTMetaL and use the browser's `Reload' button to view it again.
See Previewing your file in a browser if you want more information on the Preview... command.
As we suggested at the start of the chapter, you may now wish to skip directly to the HTML Quick Reference, or continue with the tutorial.
This section is about formatting inline text-text that's embedded in a paragraph or some other block of text. Formatting blocks is covered in the next section. In an HTML document, you add emphasis to a piece of text by surrounding it with an element. This is similar to the approach of many desktop publishing programs, in which you would, for example, highlight a piece of text and choose a type style (such as bold or italic) from a menu.
 toolbar button.
 This time, clicking on the toolbar button has surrounded the selection (with <EM> and </EM> tag icons). The text should be formatted in italic (unless someone has changed the styles). In any case, a browser will format it in italic-you can use Preview... to try this out.
Of course, you don't always have to surround the text after you've typed it-you can insert an EM element by clicking on the
toolbar button when there's no highlighted text, and then just type the text between the tags.
For more information on character formatting, see the section Character formatting in the HTML Quick Reference.
There are several elements that you can use to surround parts of your document that require special formatting. For example, suppose you wish to add a block quote to the sample document you created above:
 toolbar button.
This inserts a BLOCKQUOTE element.
As soon as you do this, HoTMetaL inserts a P element inside the BLOCKQUOTE. This is because the HTML rules do not allow text directly inside BLOCKQUOTE, but BLOCKQUOTE can contain P elements, which can contain text.
Orwell portrayed his prep school days in
harsh terms in the essay "Such, Such Were the
Joys...". This may have been the result of
interpreting his early experiences in the light
of his later political consciousness.
(B. R. Jones)
Notice that the text is indented slightly to set off the quotation. A browser will display a block quote with similar special formatting.
For more information on block formatting, see the section Block formatting in the HTML Quick Reference.
You can insert five different types of lists in your document.
Ordered lists are lists with numbered items. You don't have to add the numbers yourself-a browser will add these for you.
Orwell's Four Great Motives for Writing
 (ordered list) toolbar
button.
(ordered list) toolbar
button.When you do this, HoTMetaL automatically inserts an LI (list item) element inside the OL. With one exception, all lists consist of one or more LIs.
Sheer egoism
This is a convenient place to introduce a useful technique for adding elements: splitting the current element.
HoTMetaL splits the LI element, in effect creating a new, empty LI element after the current one. Splitting an element just before the end-tag is a convenient way of inserting a new element that has the same type as the current element. If you split an element in the middle of the text, everything before the insertion point goes in one element, and everything after goes in the other one. Another way to split an element is to choose Split Element from the Markup menu, or type Ctrl+P at the keyboard.
Aesthetic enthusiasm
Historical impulse
Political purpose
As soon as you start typing, HoTMetaL inserts an LI element, because you can't type directly inside an OL. In general, if you type somewhere that text is not allowed, HoTMetaL will attempt to insert a valid element so that you can continue entering text.
To see how ordered lists look, you should preview the document:
As you can see, the browser has inserted the list numbers automatically.
An unordered list is one whose items aren't numbered, but instead start with `bullets' of some kind. Actually there are several kinds of unordered lists available to you: here we'll use the most common and general-purpose list element, UL (unordered list). In this section you'll also learn a new markup feature, changing the element type.
 button in the toolbar.
The OL start- and end-tags have changed to UL tags. If you click on a toolbar button, and HoTMetaL can't validly insert an element, it'll try to change the current element to the one you've chosen. (You can also change the element by choosing Change... from the Markup menu, or typing Ctrl+L at the keyboard.)
The browser now displays the list items with bullets rather than numbers.
You can nest lists by inserting a UL, OL, etc., inside a list item (LI). Some browsers will change the list bullets for the nested list.
The other unordered list elements are MENU and DIR: see the section List elements in the HTML Quick reference for more information.
A third type of list is the `definition list', or `glossary list', (DL). This list is different from the others because it doesn't consist of list item (LI) elements. Rather, it consists of a series of terms (DT) and definitions (DD). As the name implies, this list is intended to display definitions, though you can use it for any list that requires two-part entries. When a definition list is displayed in a browser, a definition is typically displayed on a separate line from the corresponding term, and indented slightly.
Orwell's novel "1984" described the use of a
lexicon called "Newspeak" that was designed to give
the appearance of real content while actually
allowing the authorities to successfully lie and
obfuscate. Some examples:
 (definition list) toolbar
button.
(definition list) toolbar
button. Notice that HoTMetaL inserts the DL element just after the paragraph, because lists can't be inserted inside paragraphs.
The valid elements inside a DL are DT (definition term) and DD (definition). Although you're allowed to arrange them however you like, the normal ordering would be to have one DT (or more, if, for example, you are defining several words with the same meaning), followed by one or more DDs.
 (definition term) toolbar
button. (If you were to just start typing here, instead of inserting a
DT from the toolbar,
HoTMetaL would insert the
DT for you, because you can't type directly inside a DL.
As you become more familiar with the HTML rules, you can take
advantage of shortcuts such as this.)
(definition term) toolbar
button. (If you were to just start typing here, instead of inserting a
DT from the toolbar,
HoTMetaL would insert the
DT for you, because you can't type directly inside a DL.
As you become more familiar with the HTML rules, you can take
advantage of shortcuts such as this.)Prolefeed
 (definition) toolbar
button.
(definition) toolbar
button.Mass entertainment
Now create two more definitions:
Goodthink
Orthodoxy
Joycamp
Forced-labor camp
To see how this list is displayed in the browser:
Notice that the definitions are set off from the terms.
See the section List elements in the HTML quick reference for more information on lists.
It is normal for HTML documents to contain links to other documents, which can be located anywhere on the WWW. These links are provided by URLs (Uniform Resource Locators), which name the location and filename of a document, and the method (scheme) used to access it.
When you want to create `hot text' that someone can click on in a browser and cause a document to be accessed, you should use an `anchor' (A) element.
See also the(HoTMetaL will surround the text with a paragraph.)
 toolbar button. (This is
equivalent to choosing the Insert Anchor... command in the Links menu.)
toolbar button. (This is
equivalent to choosing the Insert Anchor... command in the Links menu.)This creates an A element, and brings up the Edit URL dialog box.
Next to the Scheme label in this dialog box there are a
text entry box
and
a pop-up menu that let you choose a
scheme, which describes how the file referred to in the URL will be accessed by a web browser. For example, if the document were on a web server, you would
choose the scheme http.
You are using this scheme because the file you're going to choose is on your own filesystem.
This causes a file selection dialog box to appear.
The file you should choose is located in the directory doc in the HoTMetaL installation directory.
Notice that the file name has been inserted in the text entry box next to the [Choose File...] button. You could have typed the file name there directly, but it's probably more convenient for you to use the file selection dialog box.
Most of the time URLs will also have a host component, specifying the network location of the file that's being pointed to, but in this case you don't need one because the file is on your local system.
The URL that you entered is displayed in the message area in the lower left corner of the HoTMetaL window. If you've chosen Show URLs in the View menu, the URL will also be displayed to the right of the A start-tag in the document window.
The next step is to enter the `hot text', a phrase that the user will click on in the browser to access the file pointed to by the URL.
bibliography
The word `bibliography' is the hot text. In a browser it will be displayed in a different color from surrounding text, and perhaps underlined, to alert the user that it points to another document or location.
To see how this works, you should view the document in a browser:
The browser will now display the file works.html.
It's possible to make a link to a specific location in the same document or in another document. Then, when you click on an anchor (call it the `source') the browser window will display another anchor (the `target') at the location you've linked to, opening another document if necessary.
This piece of text will be the target anchor.
 toolbar button, or choose
Name Target... from the Links menu.
toolbar button, or choose
Name Target... from the Links menu.The dialog box that appears lets you assign a name to the target anchor. The browser will use this name to locate the anchor. The first word in the document's selection becomes the default name, but you can enter other text if you wish.
Name
text entry box, type: Why
Notice that the highlighted text is now surrounded by an A element.
You have created the `target' anchor. Now you have to set up the `source' anchor:
One of his well-known essays is Why I Write
 (connect link) toolbar
button, or choose
Connect Link from the Links menu.
(connect link) toolbar
button, or choose
Connect Link from the Links menu.The highlighted text is now surrounded by an A element. Notice that the URL displayed in the message area in the lower left corner of the HoTMetaL window reads `#Why'. What HoTMetaL has done is create a source anchor whose URL refers to the name `Why' that you just gave the target anchor.
Now you're ready to see the effect of what you've just done.
The browser window will now scroll so that the location of the target anchor is visible.
You can also use these commands to create a link from one document to a specific location in another document. Once you create the target anchor, HoTMetaL remembers the name you gave it and the document it's in, and the next time you perform a `connect link' operation, it creates a source anchor that refers to that target anchor.
See the chapter URLs for more information.
Web documents often include graphical images. Images are inserted in a document using an IMG element.
 toolbar button.
This inserts an
IMG element, and brings up the Edit Image dialog box.
This gives you the Edit Image Source dialog box, which is similar (but not identical) to the Edit URL dialog box. In this dialog, you will construct a URL
for the image.
Edit Image Source dialog box.Alternate Text
text entry box in the Edit Image dialog,
type: Anonymous
This provides text that a browser will display if it doesn't have the ability to display images.
Edit Image
dialog box.When you do this, a graphical image will be displayed inline, in the HoTMetaL document window. (This is not really George Orwell, but another writer whose work you know if you're reading this manual.)
The inline image will be displayed in the browser, too.
For more information on images, see the chapter Working with images.
There are certain elements that a browser will display as graphical objects, such as text entry boxes or option menus, that can accept input from a user. A `form' in an HTML document is a set of such elements that lets the user enter some information and then call a program, located on a web server, that processes the information. For example, you could create a form that lets a user order a product that you're selling: you can set up the form so that when the user clicks on a `submit' button, the order is sent to your order-processing program.
To implement this, you have to:
The second of these two steps is beyond the scope of HoTMetaL. You will have to obtain supplementary documentation that explains this mechanism, which is known as CGI (Common Gateway Interface). If you open the file faq.html in the HoTMetaL directory you will find a reference to a document on this topic.
This tutorial explains how properly to set up a sample form.
We suggest that for this exercise you create a new HTML document.
Buy my book!
Just click on the "Submit" button in the form below
to order any or all of these best-sellers at a
fraction of the regular cost!
Now you're ready to start constructing a form.
 button to insert a FORM element after the P
element.
button to insert a FORM element after the P
element.This element encloses everything else in the form. For the remainder of this exercise, make sure that you're working inside the FORM element.
Notice that the
button is one that is associated with a group of associated elements. All of
the form-related elements that you'll use in this tutorial can be entered using this button.
The URL you'll create is referred to as the form's `action'.
Scheme option menu. choose `http'. Host
text entry box, type: www.sq.com
Path
text entry box, type: cgi-bin/quagmire
The `action' you've just specified refers to a program, located on SoftQuad's Web server, that can process the data entered in the form. At the end of the tutorial, you can submit the form to this program. Normally you would specify a program on your own server, though in fact you can specify programs located anywhere on the Web.
This brings up a dialog box that lets you edit the attributes of the current element.
Now you'll enter the first element that generates a graphical object in the browser:
Name:
toolbar button with the right, keeping the mouse button
pressed down.This displays a menu of form-related elements.
You can now preview the file to see what this looks like in a browser:
Notice that the browser has placed a text entry box next to the word `Name:'.
You're not done with this INPUT element yet.
This brings up a dialog box that lets you edit the attributes of the current element.
NAME, type:
cust-name
This value is used when the browser sends the form's data to the server, in order to identify which text entry box, option menu, etc., a particular piece of data came from.
Note: Important attributes (name, type, value) of form elements will be displayed in a prefix, just after the start-tag.
A text entry box in a form lets you enter just one line of text. If you need to let your users enter several lines of text at once (to enter an address, for example), you should use the TEXTAREA element.
Address:
button with the right mouse button to get the menu
of elements, and choose TEXTAREA.Note: If you want a TEXTAREA to contain some default text, enter it between the start- and end-tags.
Now you may want to see how the browser renders this object:
The browser generates a multi-line field, which may also have scroll bars.
Sometimes you will want the user to make one choice from a list of choices. In this example you'll see how to represent this with an option menu.
Credit Card:
button with the right mouse button to get the menu of
elements. HoTMetaL also inserts an OPTION element automatically.
Visa
The OPTION element represents one choice in the pop-up menu. The text that you typed inside the element is a label that will appear in the menu.
button with the right mouse button to get the menu
of elements. MasterCard
Because OPTION was the last element you inserted with the
button, single-clicking quickly on that button
with the left mouse button will insert another OPTION element.
button.Amex
To see what this looks like in the browser:
Notice that the text you typed inside each of the OPTION elements appears as labels in the option menu.
When the form is submitted, the `value' associated with this menu, which the browser sends to the server, will be the label of the item that was chosen. You can override this by setting values for the VALUE attributes of the OPTION elements.
Just to complete this section of the form:
Card number
So far you have used the INPUT element only to represent text entry boxes. Actually, this element can be used for a variety of purposes. One of these is representing check buttons: you would create this kind of box if you wanted the user to make a `yes/no' choice. (These are different from radio buttons which you would use if you want the user to make one choice from a group of choices.)
Check one or more titles:
The Dentistry of Frederic Chopin
Now add two more titles in the same way:
Motors and Such by Eddy Schneider
HTML for Travellers
To see what this looks like in the browser:
Try clicking on the buttons with the mouse. You can turn on all, any, or none of the buttons.
As we said above, you can also use the INPUT element to represent radio buttons. A group of radio buttons lets the user make one (and only one) choice from a group of choices.
Preferred language:
English
Now add two more choices in the same way (keep all three choices in the same paragraph):
French
Spanish
Notice the following about the attribute values you've just entered:
To see what this looks like in the browser:
Try clicking on the buttons with the mouse. You can turn on only one of the radio buttons at a time. The button labeled `English' is initially turned on by default.
You can use the INPUT element to generate a button that restores all the form's controls (text entry boxes, radio buttons, etc.) to their default values:
To see what this looks like in the browser:
The form's controls revert to their default values. The text entry boxes are all blank and the check boxes are turned off. The radio button labeled `English' is turned on.
Your form is almost complete. All you need to do is create a button that causes the browser to submit the form.
To see what this looks like in the browser:
The form will now be submitted to a program on SoftQuad's web server. This program doesn't actually process an order, it just echoes back the information that the browser sent it. This information will appear in the browser window: you can return to the form by clicking on the button that takes you to the previous document.
The information is presented in pairs containing a `name' (corresponding to the NAME attribute of the text entry box, check box, etc.) and a `value' (for text entry boxes or `text areas', this will be the data you typed in; for check boxes the value `on' is submitted-check boxes that aren't turned on are ignored; for radio buttons the value of the VALUE attribute is sent). You may notice a couple of unusual things about the format of the text: spaces are replaced by a `+' sign, and some special characters (notably newline, `=', and `&') are replaced by `%nn', where the n's are digits from 0-9 and/or letters between `A' and `F'. This is the standard form that browsers use for submitting data to the server.